
")


")
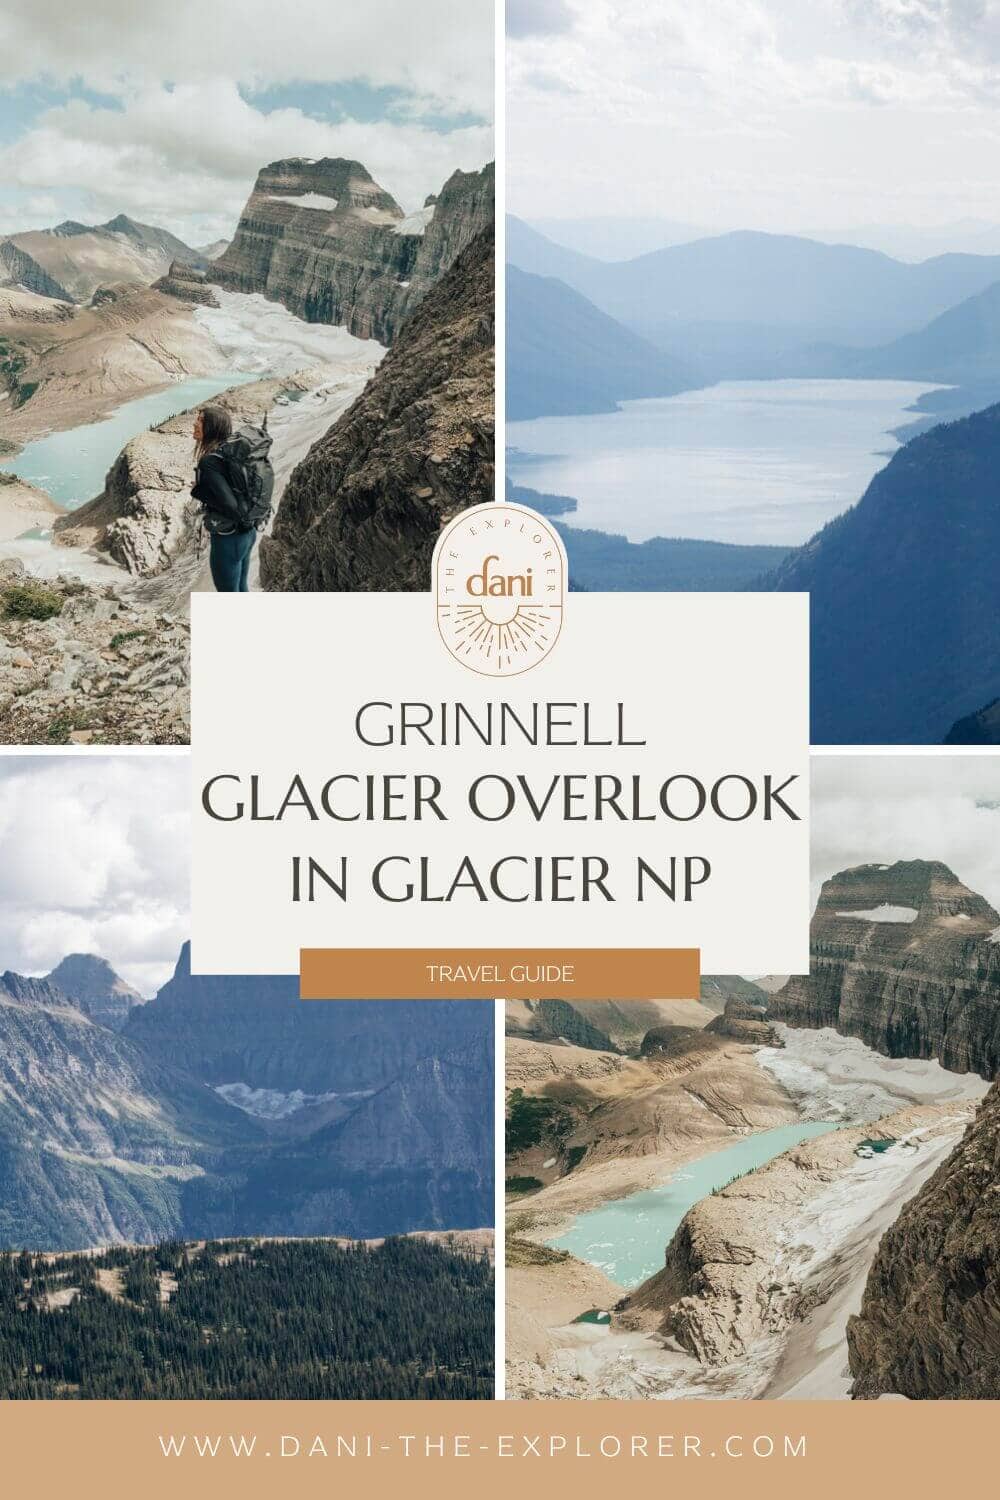
Glacier National Park is known for its mountain scapes, scenery, and hikes. Unfortunately, with even the most well-planned itinerary, it can take time to see everything the park offers. But there is one hike that can get you pretty close: Grinnell Glacier Overlook.
Grinnell Glacier Overlook is a bucket list hike that will weave you in and out of Glacier’s most beautiful peaks until you get to a viewpoint of Grinnell Glacier—a glacial formation that dates back to the Little Ice Age.
There are a couple of different paths to get here, which is why this blog will detail everything you need to know about this adventure so you can plan the perfect trip to Glacier National Park.
Let’s dive in!
📌 Save this to Pinterest!
FREE CLASS: Get PAID to Travel!
Sign up for my free class and learn how I land paid brand deals that pay me to travel as a content creator and influencer!
How to Get to the Grinnell Glacier Overlook Trailhead
Let’s first discuss your two options for getting to the trailhead.
Remember to grab your America the Beautiful Pass for your trip to Glacier!
Option 1: Granite Park Trail
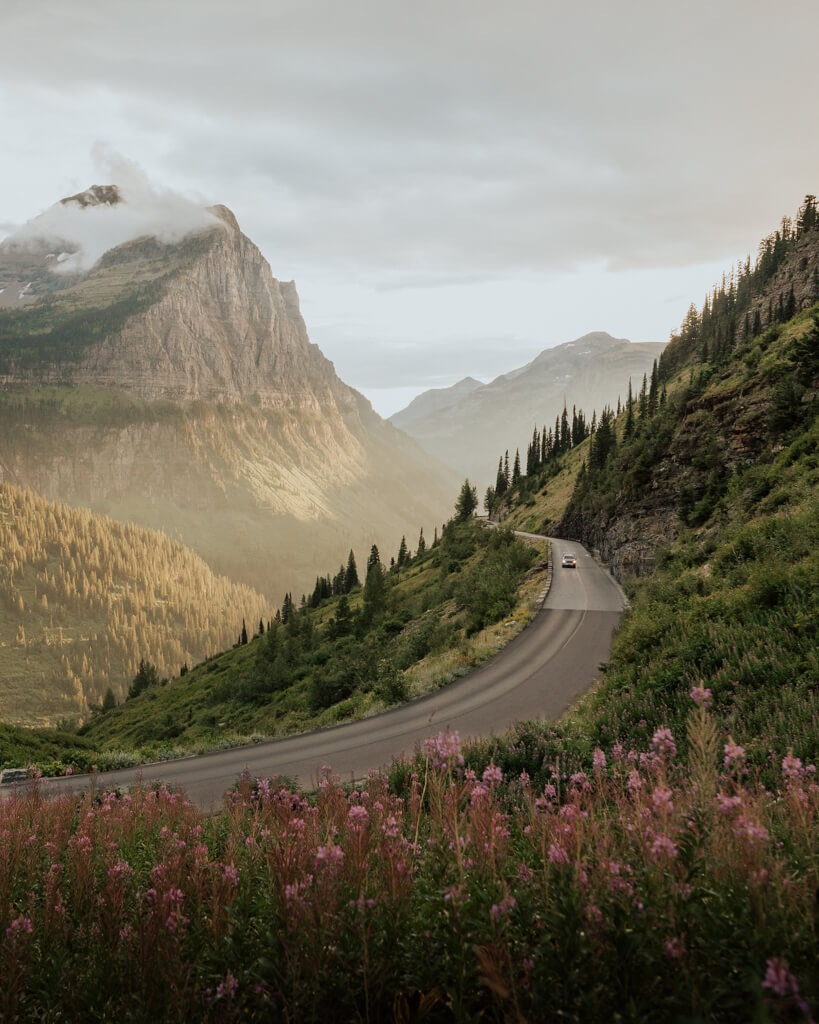
You can start your hike from The Loop (Granite Park Trail) on Going-To-The-Sun-Road, climb about 3,700ft of elevation gain to Granite Chalet, then hike up to the Overlook, then back down the same way.
Some folks choose this option because it gets you to the Overlook faster, BUT you will have a steep climb ahead of you and get few views.
Option 2: Highline Trail
Hiking to Grinnell Glacier Overlook via the Highline Trail will take you longer to get to the Overlook, but the climb is gradual and really scenic.
This is the route I took to get there.
Here’s a rough look at the path you’ll take:
Logan Pass >> Highline Trail >> Grinnell Glacier Overlook >> Granite Park Chalet >> The Loop
While this may seem like a lot, the trail is easy to navigate. Since this path is more accessible than the alternative, we’ll continue the blog explaining this route!
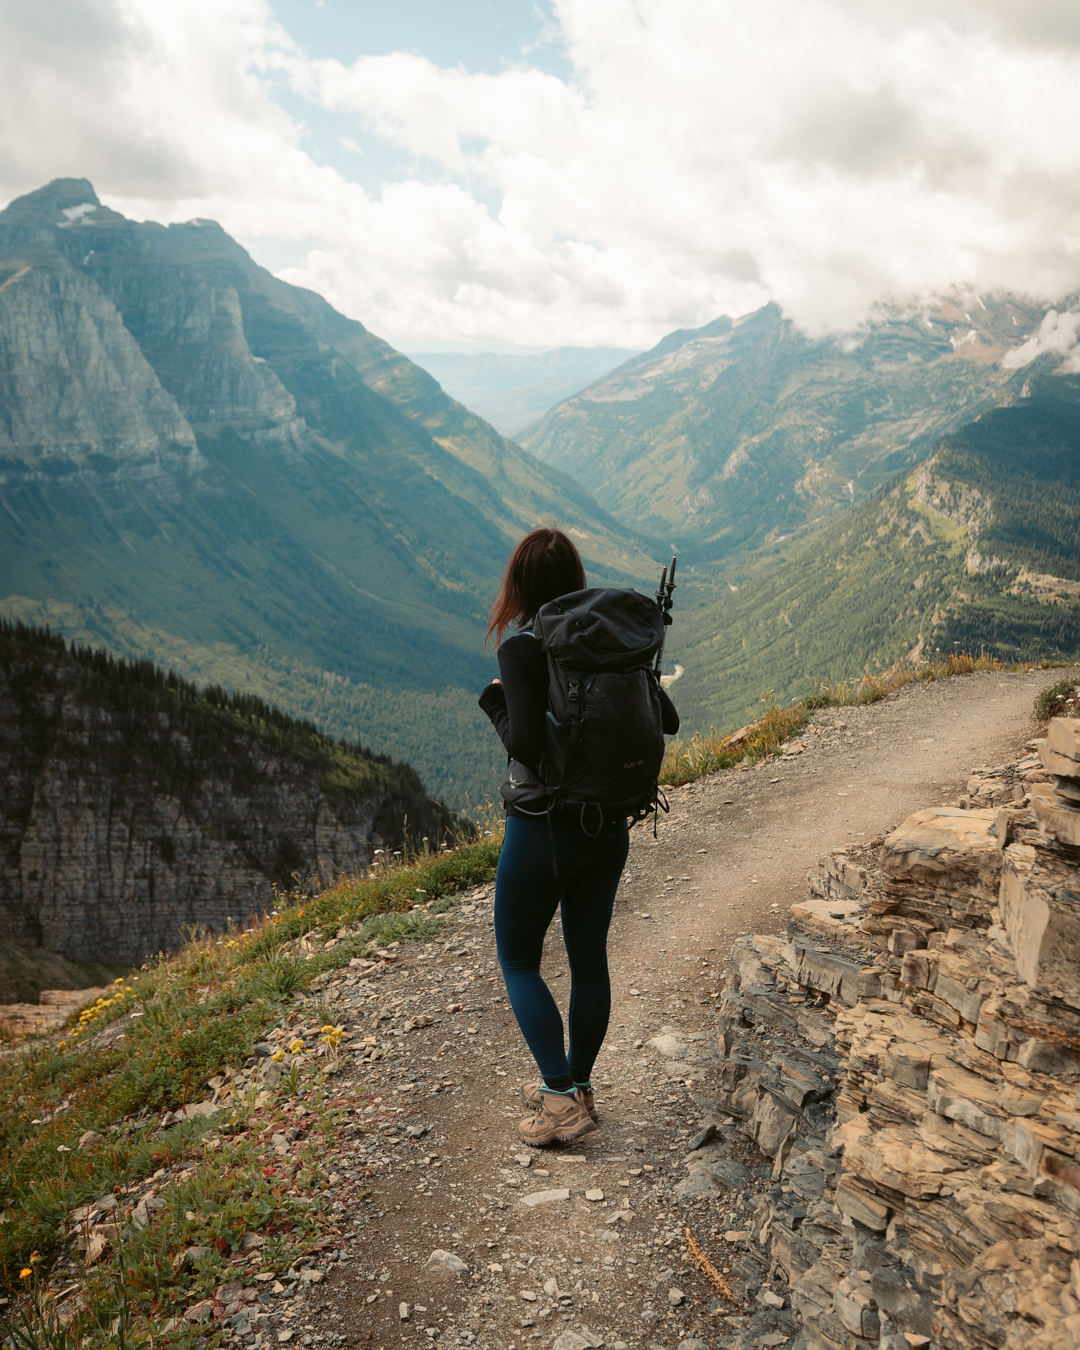
Hiking Grinnell Glacier Overlook via Highline Trail
- Trail Location: Logan Pass
- Elevation Gain: 365ft
- Trail Distance: 11 miles – starting from Logan Pass and ending at The Loop
- Trail Includes: Scenic photo spots, wildlife, mountain views
- Difficulty: Difficult
- Hardest Part: After 6 miles, you’ll reach the side trail to the Overlook. In .6 miles you will gain over 900ft in elevation!
Let’s cover all the details for this hiking route.
Parking Your Car
You can start your hike by driving up to Logan Pass, parking in the lot, and hitting the Highline Trail.
The other option is to park your car at “The Loop,” shuttle to Logan Pass, and hit the Highline Trail.
The benefit of doing the latter is that since your hike will end at The Loop, you’ll get to hop in your car and leave as soon as you’re done!
Additionally, I prefer to take the shuttle bus at the beginning of the hike because the buses tend to get busy near the end of the day.
To park at The Loop, drive along Going-To-The-Sun-Road and park your car at 48.7549762,-113.8004923.
There are about 8 to 10 parking spaces at The Loop, so you will want to get there early.
Once parked, you will walk down the steps at The Loop and wait for the eastbound shuttle bus.
Pro Tip: Eastbound from this area is going uphill (that’s what you want), and westbound (taking you out of the park) will go downhill.
Pro Tip 2: Just to give you a range, we arrived here at 9 AM, and the hike took about 6 hours to complete. The shuttle buses stop running at 7 PM, so if you’re going to park at Logan Pass and end at The Loop, ensure you have enough time to catch the last bus.
Read Next: 3 Day Glacier National Park Itinerary
Logan Pass Visitors Center
Once you have shuttled your way up Going-To-The-Sun-Road, make sure you get off at Logan Pass Visitors Center.
This is home to some fantastic trailheads like the Hidden Lake Overlook Trail.
Logan Pass will be the place to take a bathroom break if you need to before starting your hike up to Grinnell Glacier Overlook!
From the Visitors Center, walk across the road and hop on the Highline Trail.
Read Next: Hiking Hidden Lake Overlook Trail in Glacier NP
Starting Grinnell Glacier Overlook on The Highline Trail
Now it’s time to start hiking officially!
From the beginning of the hike, you’ll be able to tell you’re somewhere special.
All the fantastic peaks in your view as you drive up Going-To-The-Sun-Road are now at eye level with you, and it’s spectacular.
The first half of your hike will be gorgeous and pretty flat! You might even spot a bighorn sheep or two walking along the grass.
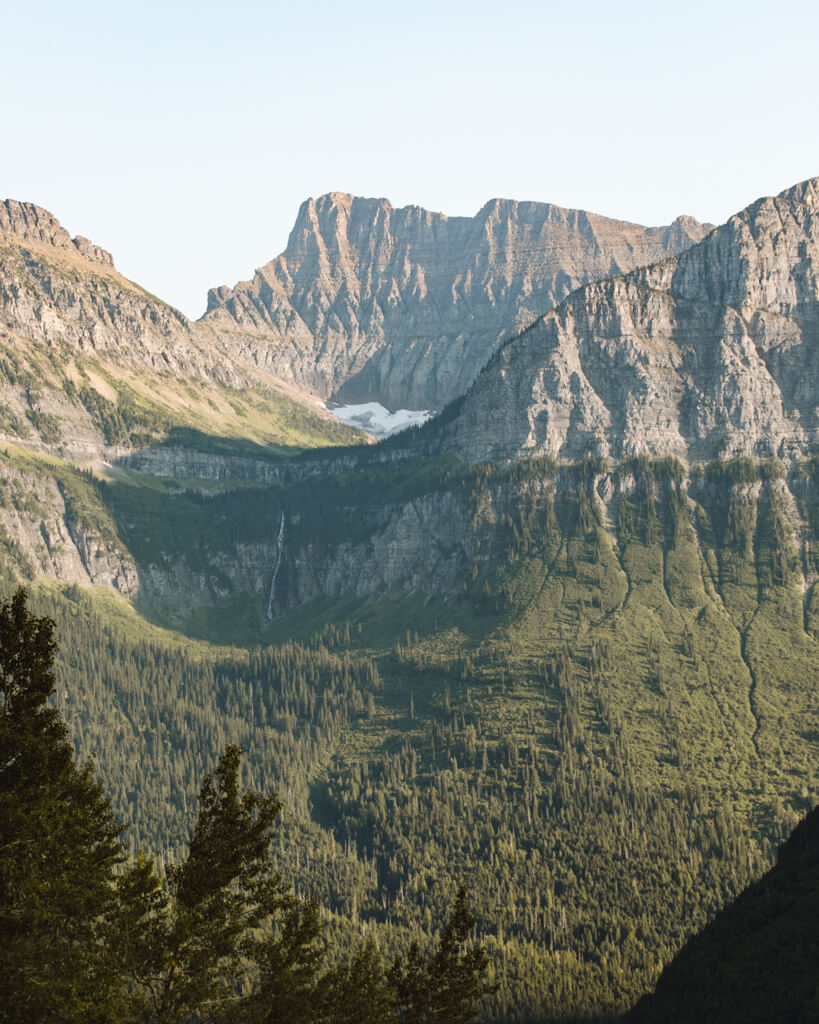
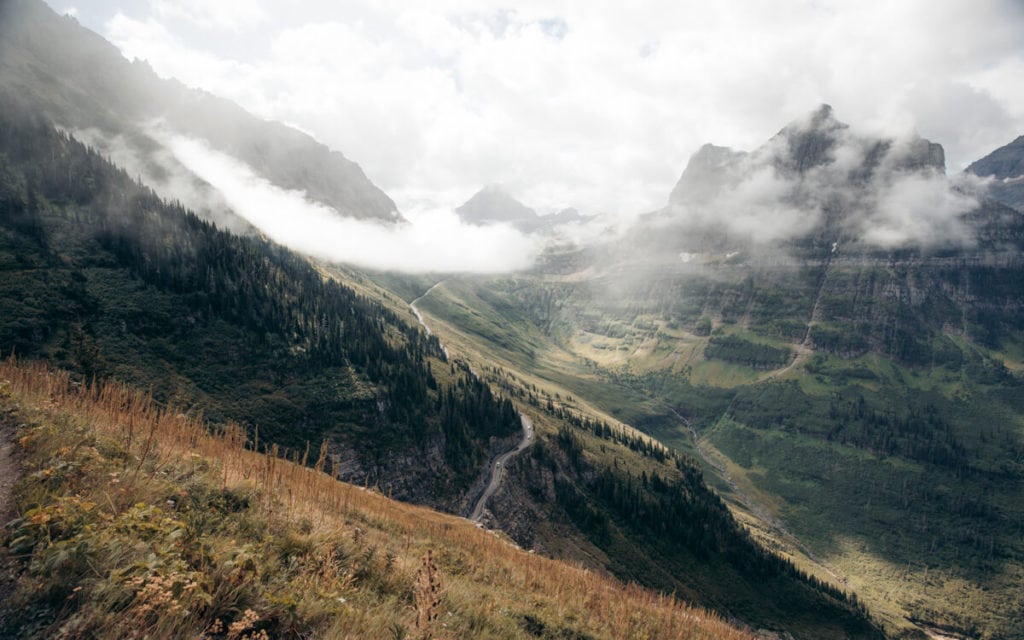
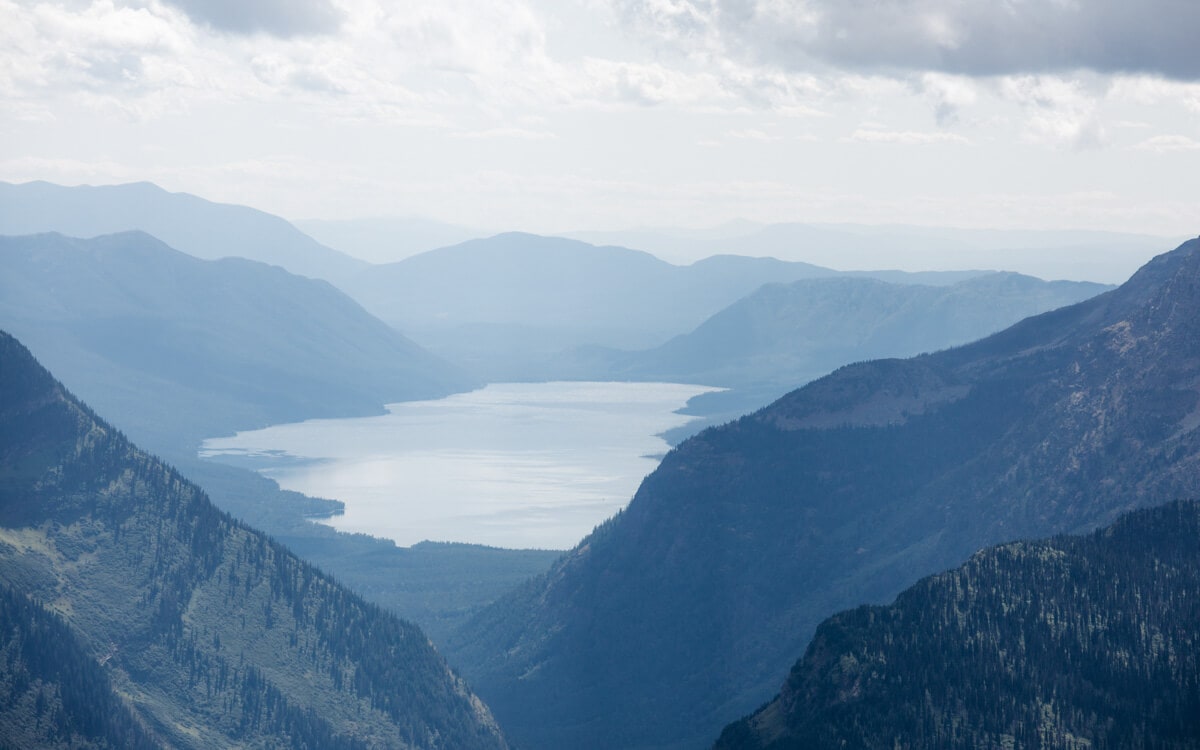
Eventually, the trail will lead you in between mountains, and you’ll be able to see valleys that look right out of a dream.
I recommend having your camera handy! You’ll want to take photos while you hike!
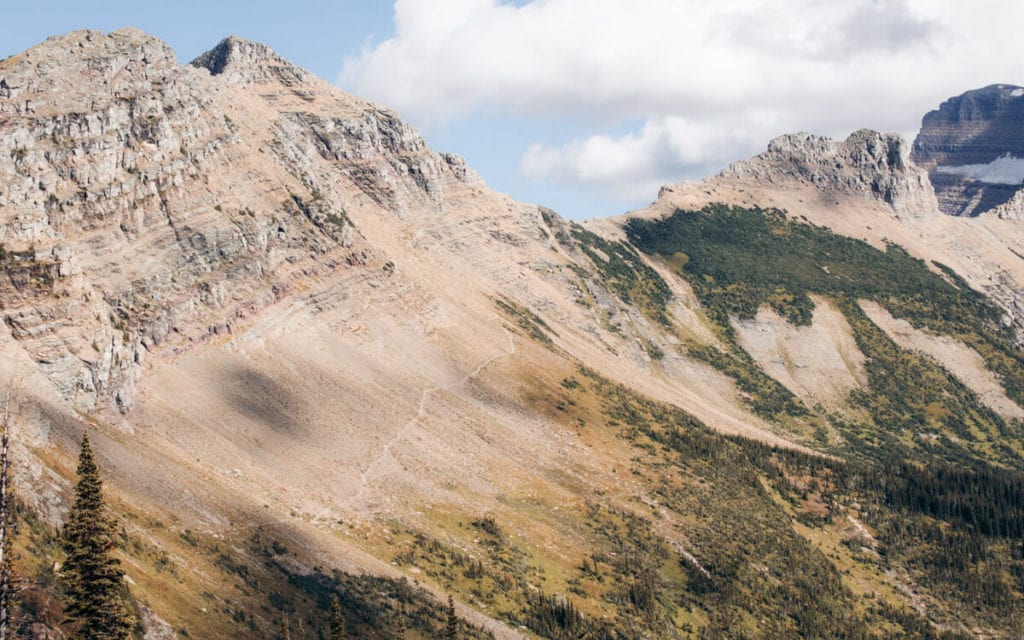
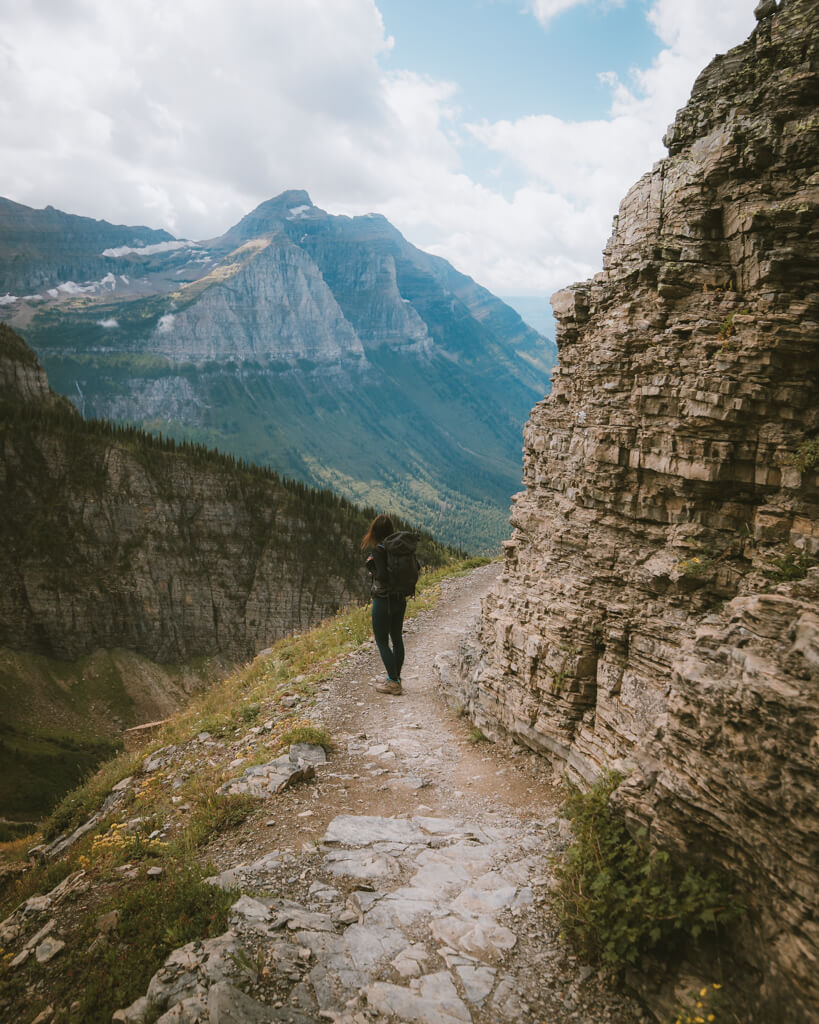
After a few miles, the trail will climb up a few switchbacks, getting you closer to the Overlook.
The switchbacks lead up to Haystack Pass — it is so scenic! The climb here is about 275ft.
After your climb, the trail will begin to descend towards Granite Park, where you will find the side trail leading up to Grinnell Glacier Overlook.
Tip: Make sure you turn around! There will be mountain views at just about every corner. Stop when you can to take pictures from the top of Haystack Pass!
The Climb Up to Grinnell Glacier Overlook
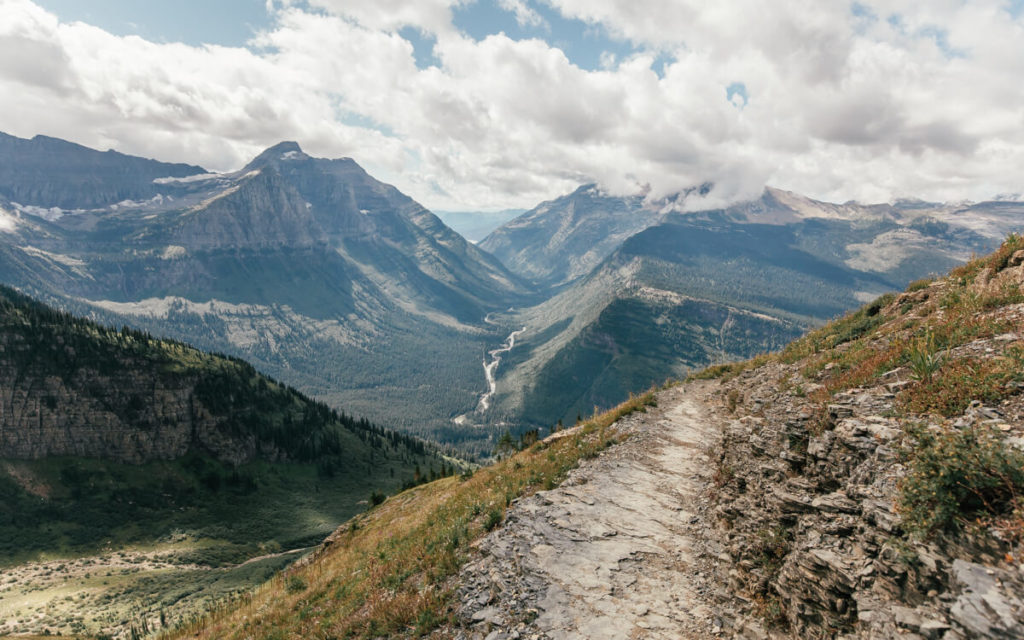
After hiking the Highline Trail for 6.8 miles, it’s time to hike up to Grinnell Glacier Overlook.
The path to get to Grinnell Glacier Overlook is a grueling half a mile (ish) that will have you gain about 1000 feet in elevation.
Your legs will feel the burn, but don’t let that stop you!
The views will be so worth it when you get to the top.
There are places to take breaks between the climb, and plenty of people will be, so don’t shy away from catching your breath.
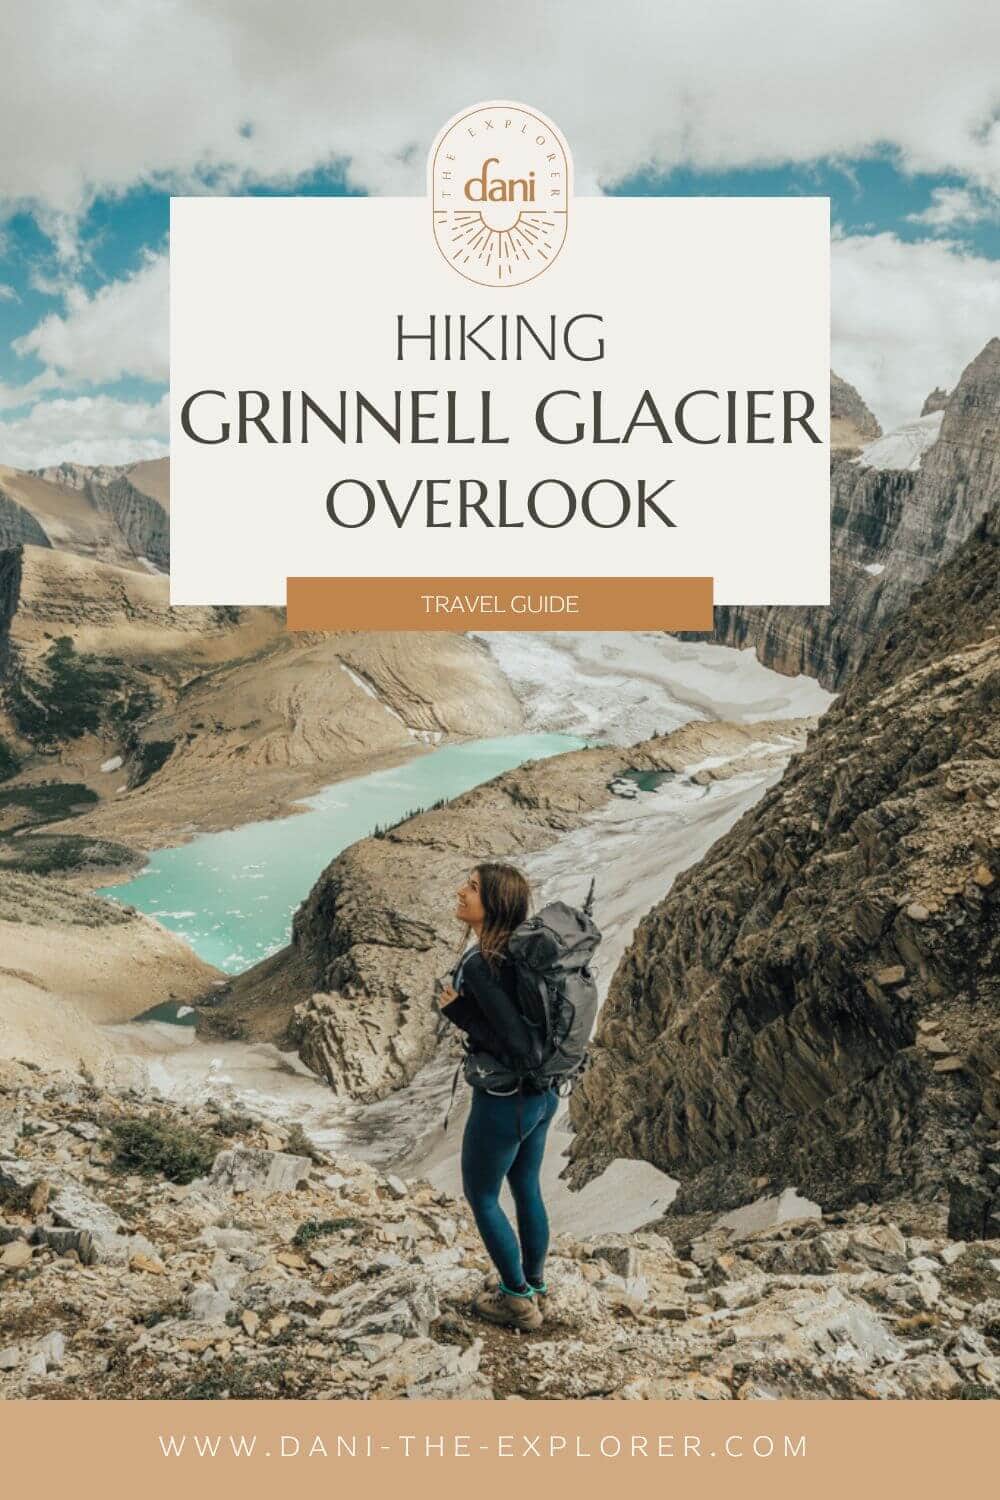
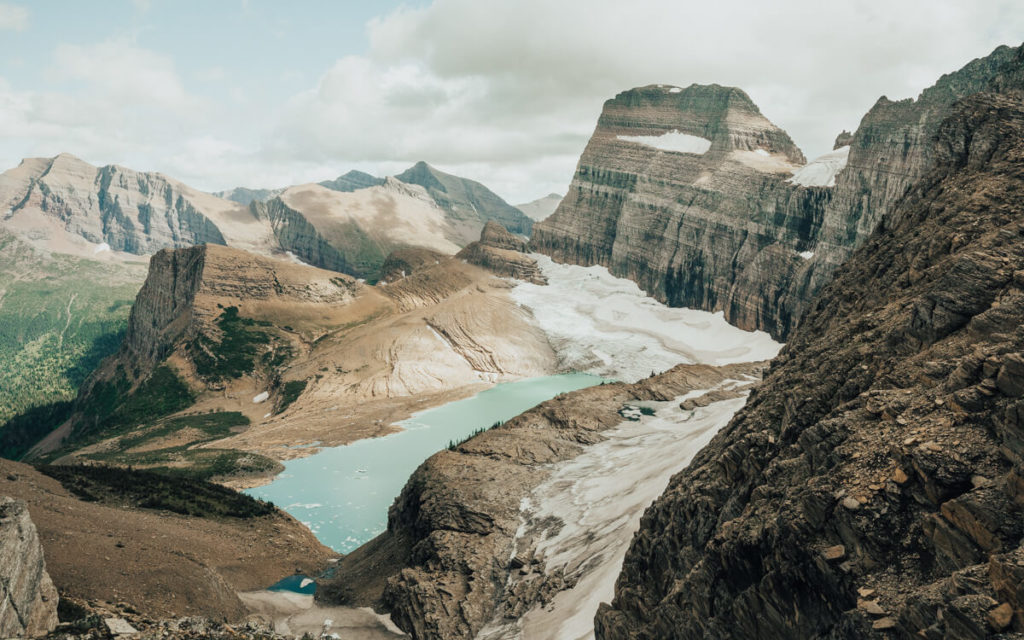
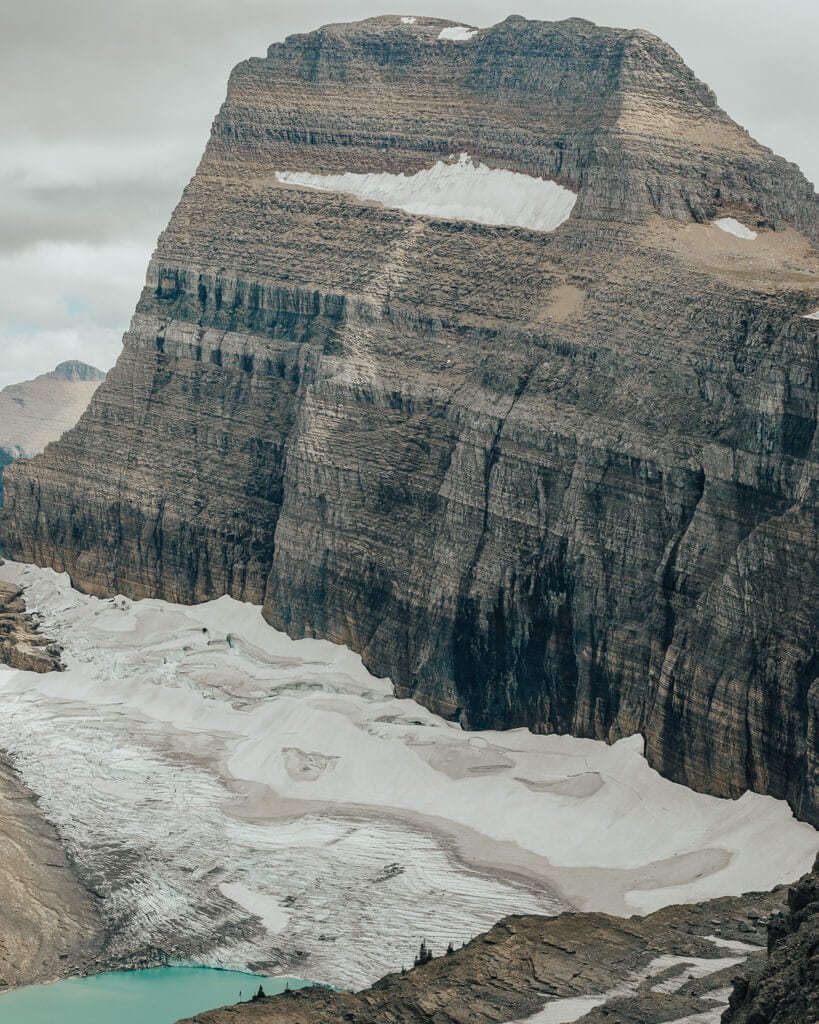
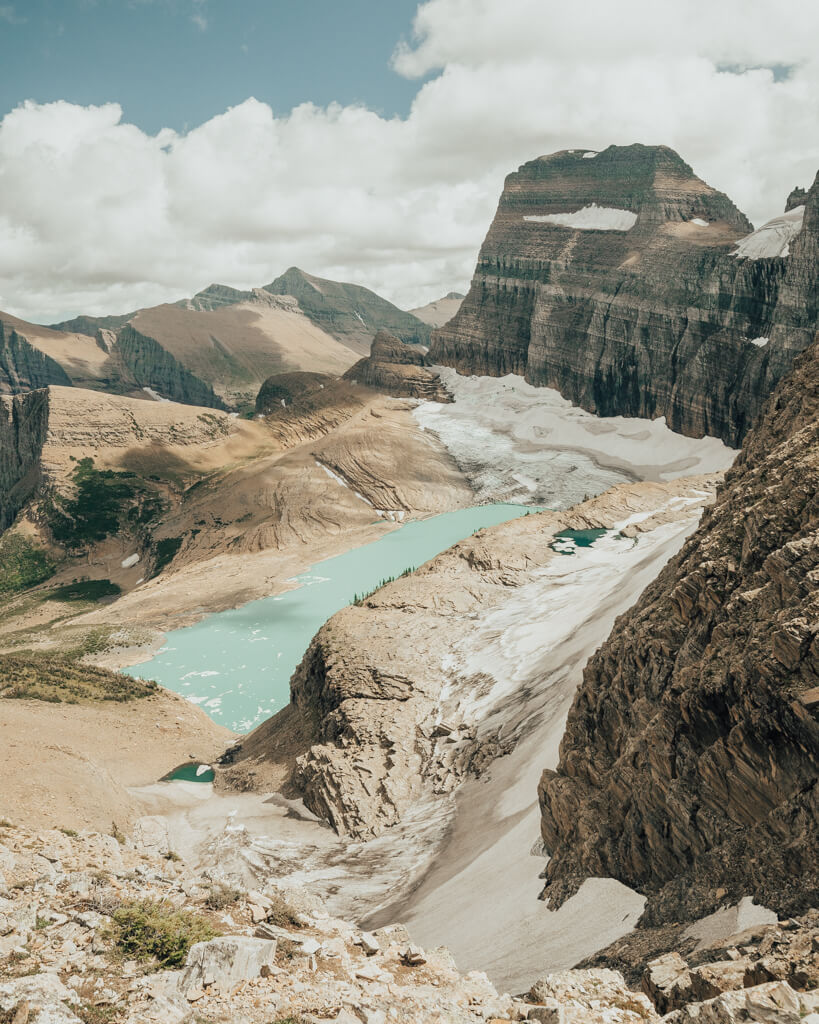
The Overlook
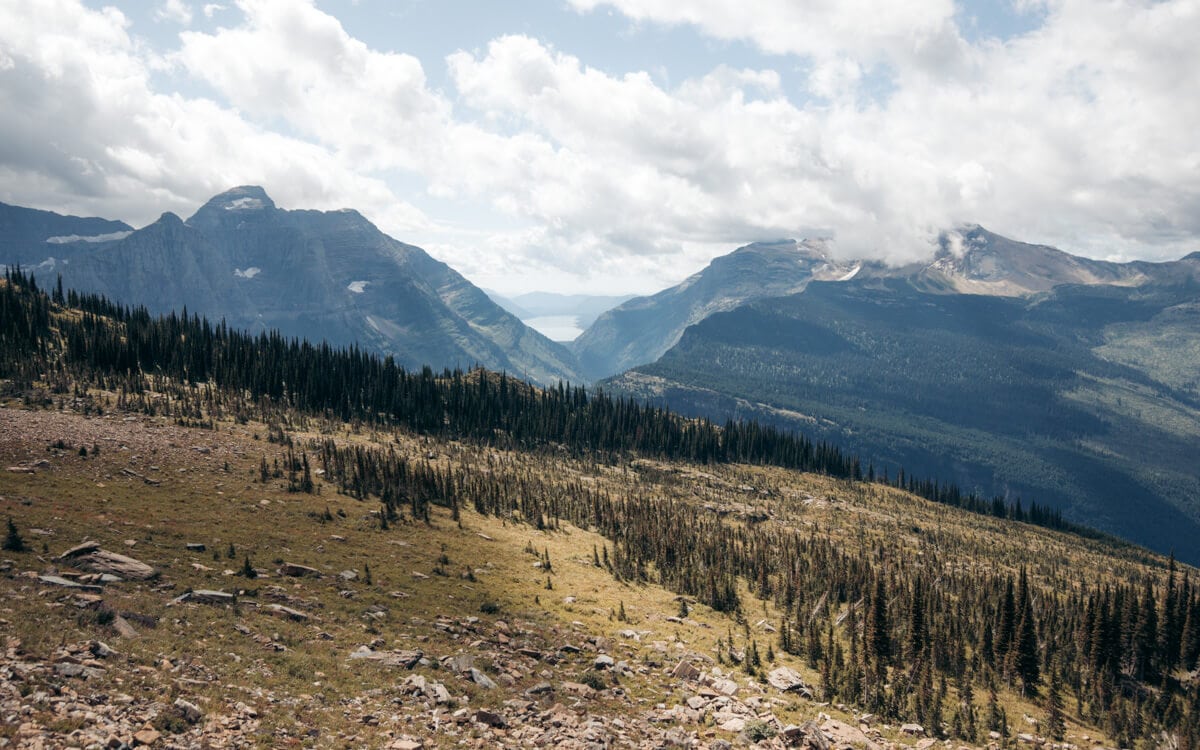
When you come upon Grinnell Glacier Overlook, you will have the biggest smile on your face.
There are quite a few photo opportunities at the top. Scott and I chose to go to the leftmost area, which gave us a clear view of Grinnell Glacier and the lake down below.
Some other folks decided to go to the right and hike up to a higher viewpoint.
After exploring Grinnell Glacier Overlook, it’s time to hike back down.
When you reach the bottom of the path, you’ll continue right and start walking towards Granite Park Chalet. Make sure you have your camera!

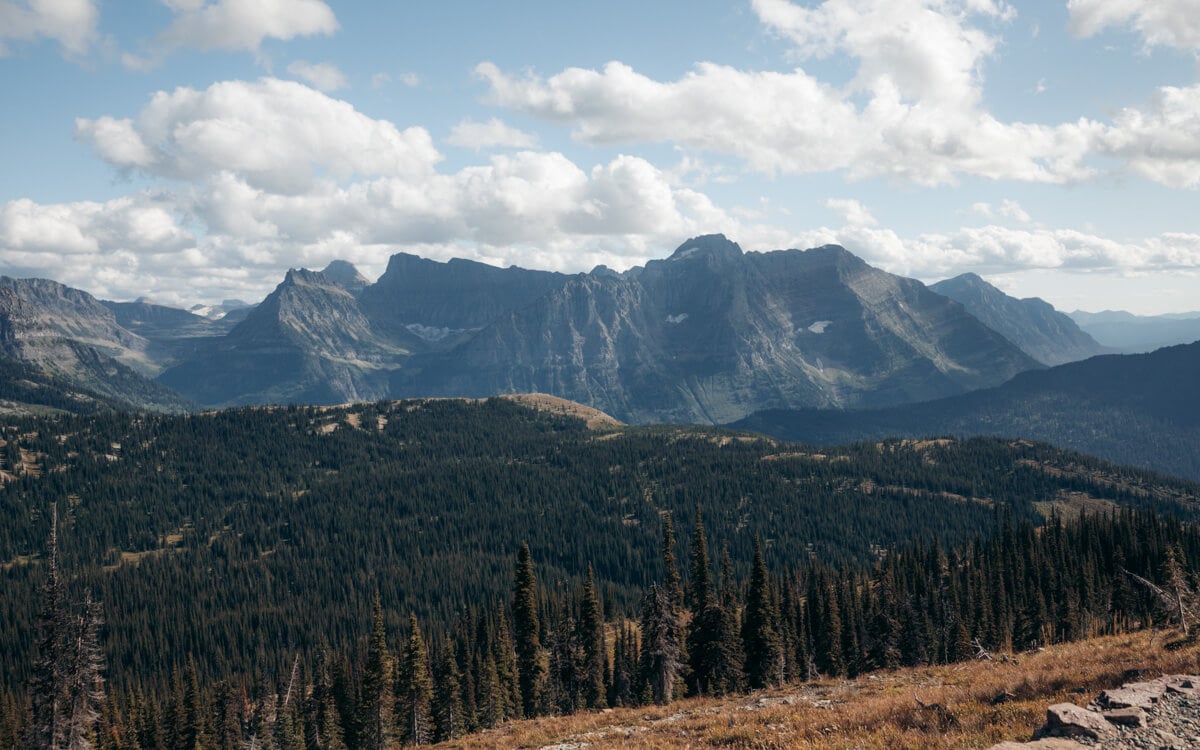
Granite Park Chalet
The hike to the Chalet is flat and relatively quick.
The Granite Chalet is a historic chalet built back in the early 1900s to provide accommodations in Glacier National Park.
There is a little eating area and store in the Chalet, so if you want to take a break from hiking, do it here!
The Chalet area was also quite photogenic as it has 360 views of Glacier National Park’s most magnificent peaks.
After taking a break, get ready to finish your hike.
You only have 4 miles to go! And they’re all downhill!
Finish—Getting Back to The Loop
After relaxing at the Chalet, it’s time to hike downhill and back to The Loop.
You’ll go through some lush forest along the way.
The switchbacks on the last leg of the trail will all be going downhill until you finally reach a small creek and a bridge, your last hundred feet, before getting back to The Loop!
And congrats! You finished the hike — woohoo!
Tip: The trail from the Chalet to The Loop has little to no shade! This is a recovering burn area, so there are no large trees. I recommend wearing a hat and sunscreen during your hike.
Tips for Hiking Grinnell Glacier Overlook
Now that you know what to expect on the trail let’s go over some tips for hiking Grinnell Glacier Overlook.
Save the Hike for a Sunny Day
The best part about hiking Grinnell Glacier Overlook is the views! Plan to hike the trail on a sunny day to get the most out of your adventure.
Bring a Wide Angle Lens
For the best images, bring a wide lens with you! Scott and I relied on our 16-35mm f/4 lens, but an excellent 24-70mm f/2.8 can also work. If you’re curious about our camera gear, read our blog here.
Read Next: The Travel Blogger Camera Gear I Use
Plan to Hike Mid-Day
While I don’t enjoy hiking mid-day because the light can be harsh, the Grinnell Glacier Overlook Trail is very long, and you want to ensure you’re back to your car before dark!
And remember, if you’re planning on taking a shuttle when you’re done hiking, the last shuttle leaves at 7 PM.
Pack Lunch
The Grinnell Glacier Overlook Trail has plenty of places you can stop along the way and grab a snack from your bag or a quick lunch. Take as many breaks as you need! Scott and I packed peanut butter and jelly sandwiches for our hike.
Stay on Trail
Please avoid walking in the meadows! The vegetation in Glacier National Park is very fragile and can take hundreds of years to grow back if you trample all over it.
Leave Wildlife Along
Feeding wildlife in Glacier National Park is extremely dangerous as they can get accustomed to humans and attack for food. This eventually results in the unnecessary death of wildlife.
What to Pack for Grinnell Glacier Overlook Trail
Below is a short list of what to pack with you on your hike to Grinnell Glacier Overlook.
Please note that all the gear I recommend comes from personal experience with the items! If I have never used a piece of equipment, I recommend a piece that my friends swear to buy. I want you all to have the best gear available, so I’ll never put something in my blog that I don’t think you’ll personally love :).
Sturdy Hiking Boots
The Grinnell Glacier Overlook Trail can be extremely rocky. For this reason, protect your feet with some good hiking boots! I love my Keen Targhees. Check out sturdy hiking boots availability >>
A Comfy Hiking Pack
I recently traded my old raggedy hiking pack for an Osprey pack, and I LOVE it. My favorite part about it is that it’s spacious enough to hold all of my camera gear. Check out Osprey pack availability >>
Trekking Poles
If you’re soft on the knees,I recommend snagging some trekking poles! Trust me, a good pair of trekking poles will do you WONDERS when you’re climbing down that steep half-mile path from the Overlook. Check out trekking poles availability >>
Bear Spray
Bear spray is a MUST on Grinnell Glacier Overlook Trail! As with all hikes in Glacier National Park, you must be bear aware during your visit. For more bear safety tips, you can read this article here.
A Reusable Water Bottle
Let’s go plastic-free, folks. There is not much shade along the trail, and it is LONG. You will need water! I recommend bringing a Hydroflask for your hike! Check Hydroflask availability >>
Sunscreen
Remember to wear good sunscreen! You can still get a tan when you wear sunscreen, but you can avoid harmful rays. Check sunscreen availability >>
Hiking Grinnell Glacier Overlook—My Final Thoughts
I hope this blog gave you everything you need to know about hiking Grinnell Glacier Overlook. It’s a gorgeous trail, and you won’t regret the adventure!
For more help with planning your Glacier National Park trip, check out my other guides:
