
")


")
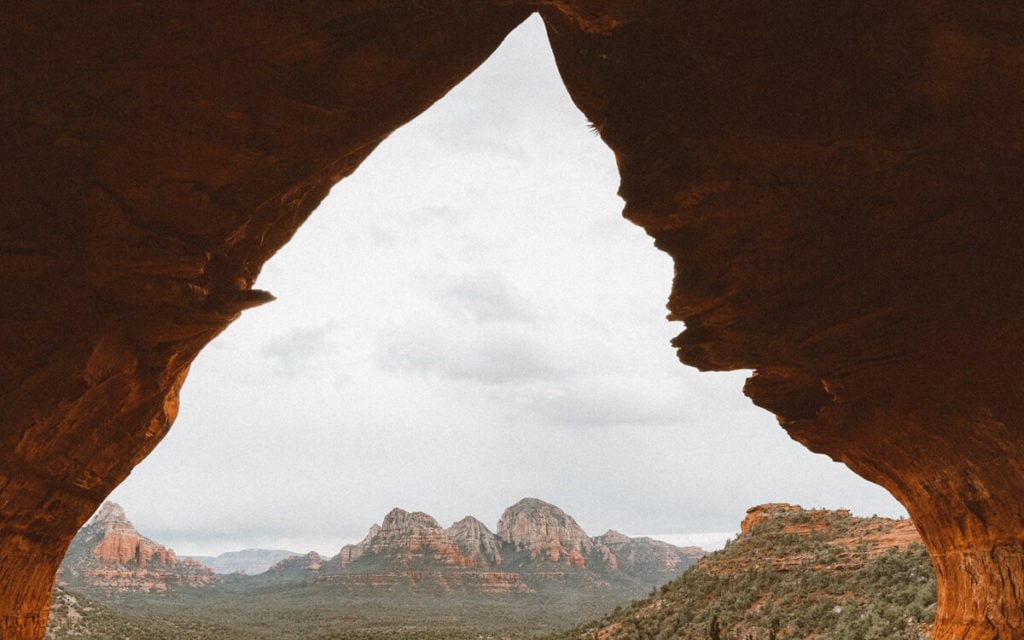
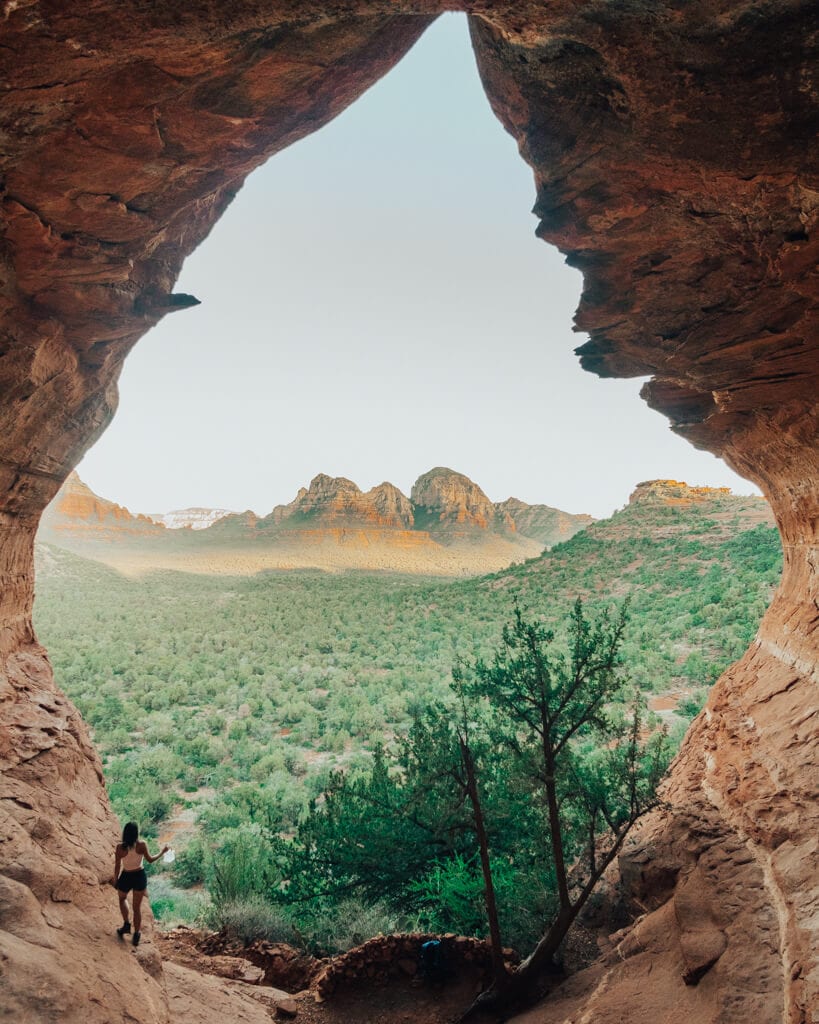
Famous for its iconic teardrop shape and sacred (oooooh) powers, visitors near and far visit Birthing Cave in Sedona, Arizona, to marvel at its existence. Believe it or not, this cave used to be relatively hush-hush and hard to find.
As a result, it was and easy Sedona hike primarily visited by locals! But over time, the Birthing Cave has become a must-see Sedona attraction for Sedona first-timers and frequent fliers.
So let’s begin. We’ll start with the must-know details on the cave, then get into the hiking trail. When you’re done with this blog, I suggest you read my other Sedona posts to help you plan the best desert trip of your liiiiiiiiiife… 😉
- Sedona 3 Day Itinerary
- Sedona Travel Guide
- Most Instagrammable Places in Sedona
- Best Sedona Sunset and Sunrise Hikes
- Best Sedona Vacation Rentals
FREE CLASS: Get PAID to Travel!
Sign up for my free class and learn how I land paid brand deals that pay me to travel as a content creator and influencer!
Birthing Cave Hike Fast Facts
- Long Canyon Trailhead: 34°54’24.0″N 111°49’27.5″W
- Difficulty: Easy
- Distance: ~2 miles round trip
- Time to Cave: About 15 to 30 minutes
- Elevation Gain: ~200ft
- Parking: Minimal
- Best Light: Sunrise
- Red Rock Pass required? No
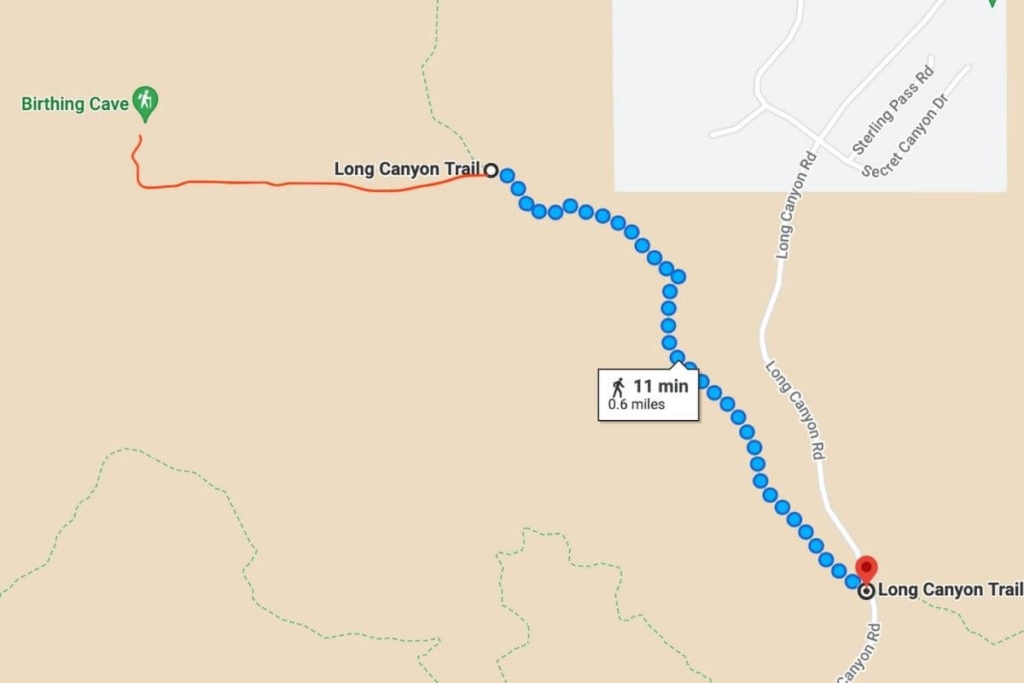
Below you’ll find a map that indicates the route you’ll be taking along your Birthing Cave hike. The waypoint at the bottom righthand corner is Long Canyon Trailhead.
The long red line on the left is where you will verge OFF of Long Canyon Trail and make your way to the cave.
Planning Your Hike
The benefit of hiking to the Birthing Cave is that the trail is relatively flat and short—who doesn’t like that? But, that doesn’t excuse you from a bit of pre-planning before you set off on your hike.
So let’s talk about what to know before ya go.
Getting to the Trailhead
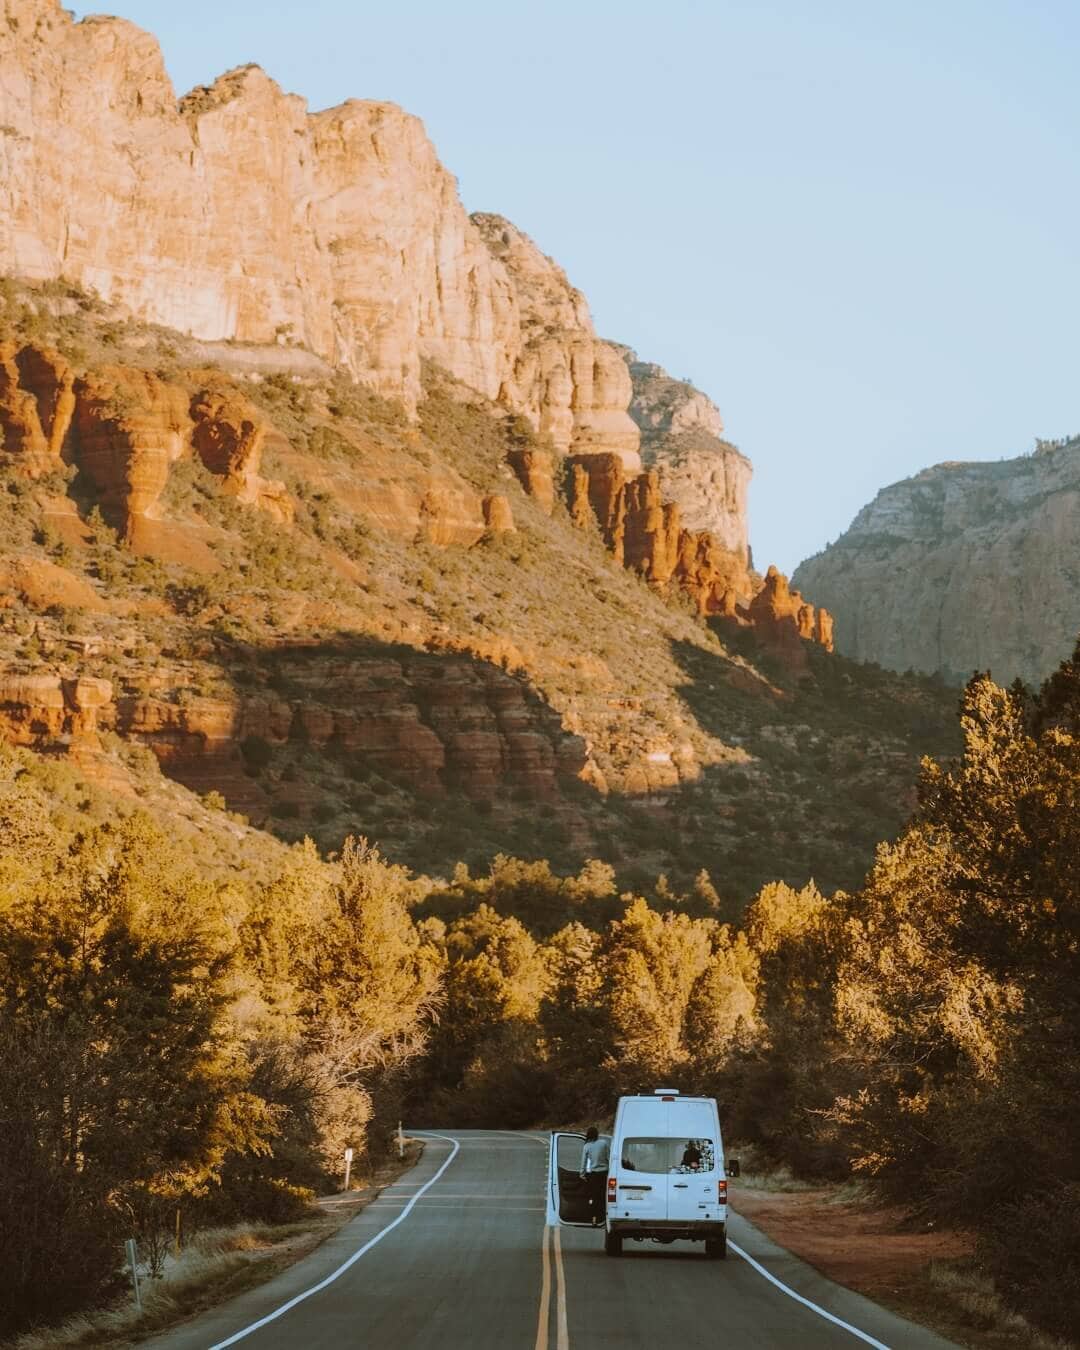
Your hike to the Birthing Cave Sedona will begin on Long Canyon Trail. To get to the trailhead from the heart of Sedona, AZ, head west on 89A.
After about 3.4 miles, you’ll turn right onto Dry Creek Road. You’ll take Dry Creek Road for 2 miles until it turns into Boynton Pass Road. This is the same area you use to access Chuck Wagon Trail to hike Devil’s Bridge!
Continue on Boynton Pass Road until you reach the junction to Long Canyon Road. Make a right on Long Canyon Road, and drive down it for 0.5 miles, where you will see a small dirt lot representing the Long Canyon Trailhead.
Boom! You’re there. The only downside is that the lot is tiny. It is only big enough for a handful of cars.
If you cannot find parking, you can try to park along the shoulder of the road, but I would caution you on this because Sedona has been getting more strict about shoulder parking (for safety reasons).
The other alternative is to park at Mescal Trailhead, which you will pass on your drive up Long Canyon Road.
Best Time to Go
Now that you know how to get to the Birthing Cave trailhead and the parking situation let’s use this as the perfect segway into when to go. The best time to hike Birthing Cave Sedona is for sunrise or in the late afternoon to evening—these times will give you your best shot at getting parking and offer the best light for photos.
You can undoubtedly hike the Birthing Cave mid-day. As a matter of fact, when I plan a Sedona itinerary, I’ll hike to the cave in the middle of the day in between my other activities.
It’s easy enough to allow for that!
The Birthing Cave Sedona hike can take anywhere from 15 to 30 minutes to complete. If you’re worried about time and want to hike here for sunrise, I suggest getting to the parking lot about 45 minutes before the sun comes up.
That’ll give you time to navigate the trails in the dark, get to the cave, and settle in!
Now let’s talk about the hike itself.
Hiking to Birthing Cave Sedona
Hiking to the Birthing Cave is so easy it’s almost too good to be true. Once parked, begin your hike down Long Canyon Trail.
You will be hiking the trail for about 0.6 miles until you reach a fork that will lead you to the cave. You’ll find that the trail is surprisingly flat—woohoo!
At the 0.6-mile mark, you’ll see a wooden fence on your right-hand side. This is a good indication that you’re at the fork to reach the cave!
Take a left on the open path, and continue making your way to the red rocks ahead. This is where the Birthing Cave lies.
You’ll follow this path for about 0.3 miles, and as you get closer to the red rocks ahead, keep your eyes peeled for a narrow way that will go upwards into the red rocks. It’s easy to spot since so many people have used it for hiking to the cave.
This is the short path that will finally lead you into the cave. It’s a bit steep but extremely short. Climb up, and you made it!
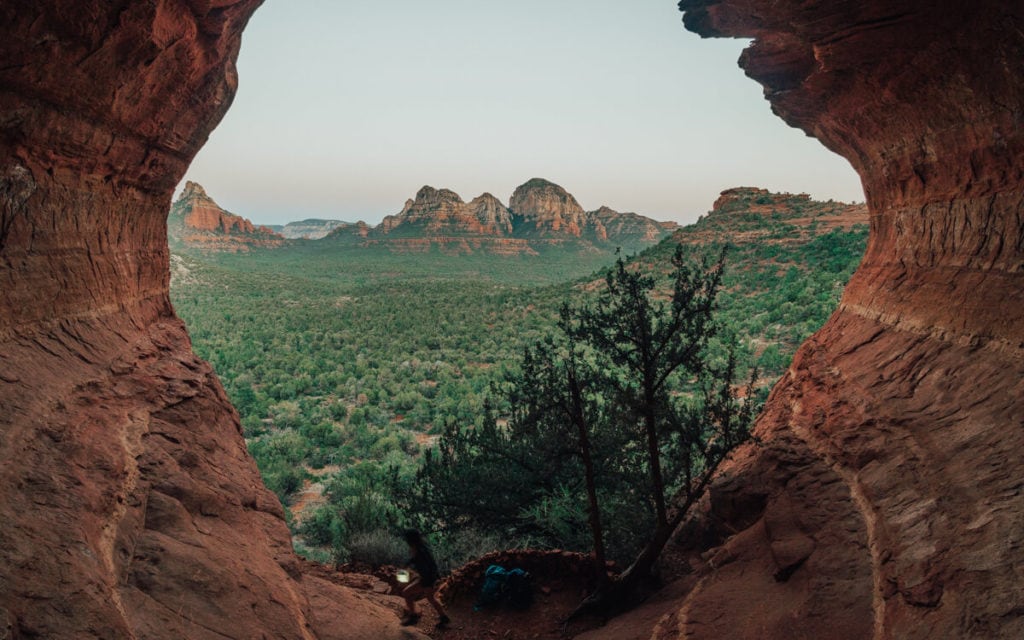
Inside the Cave
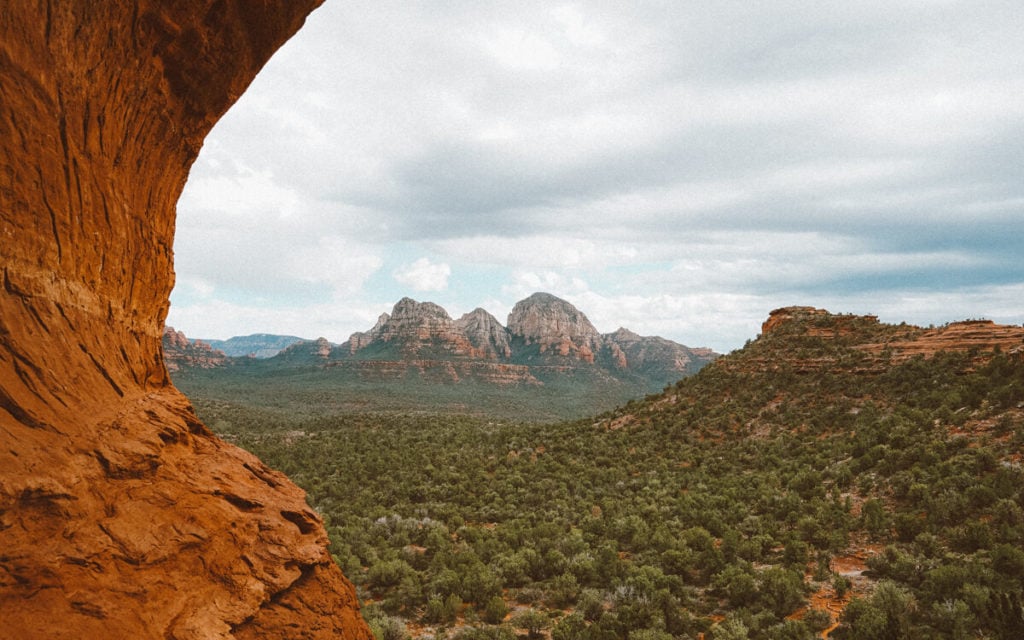
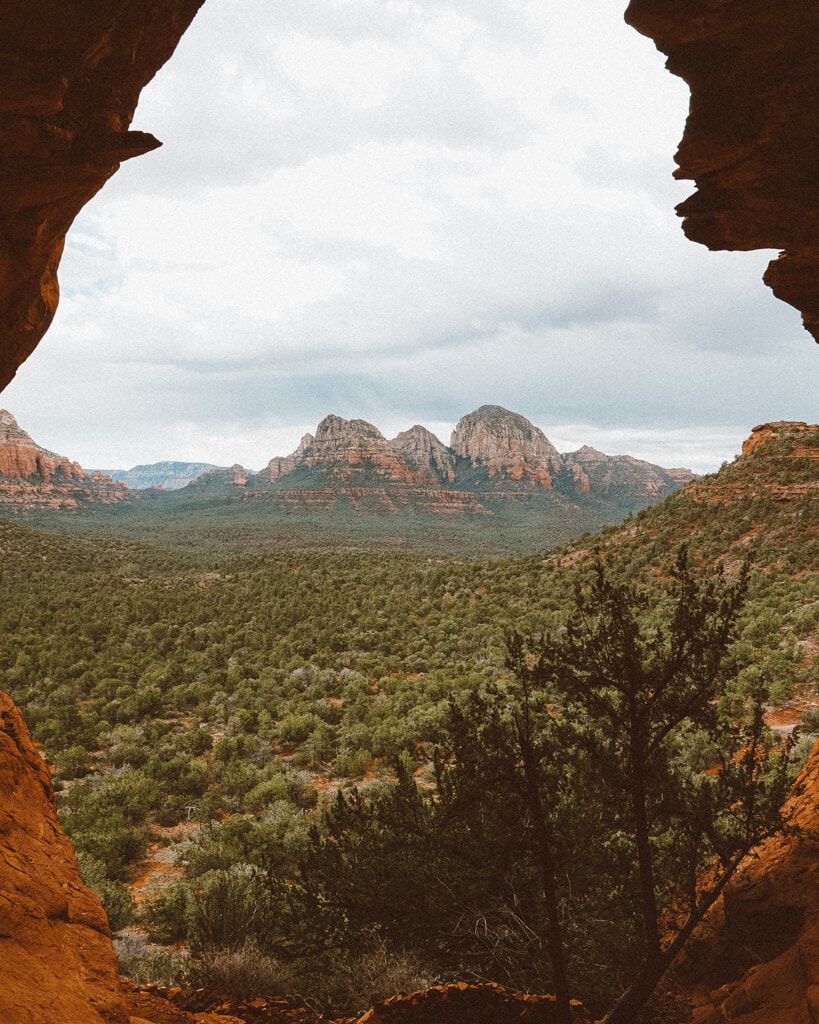
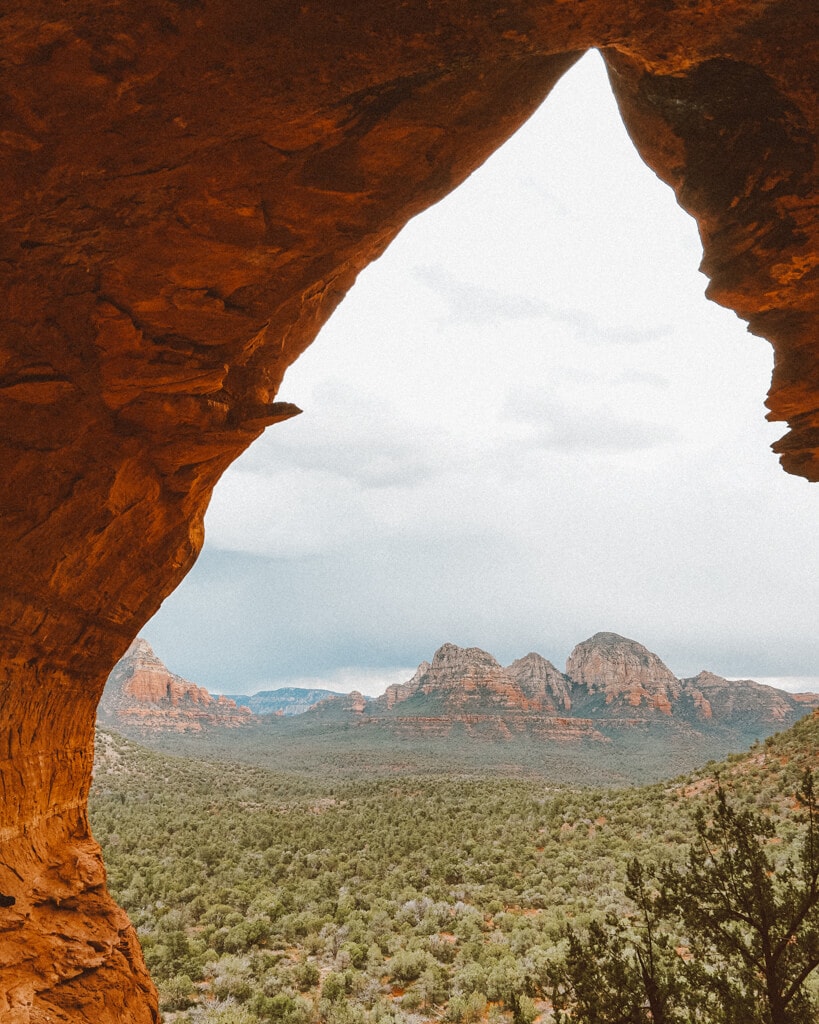
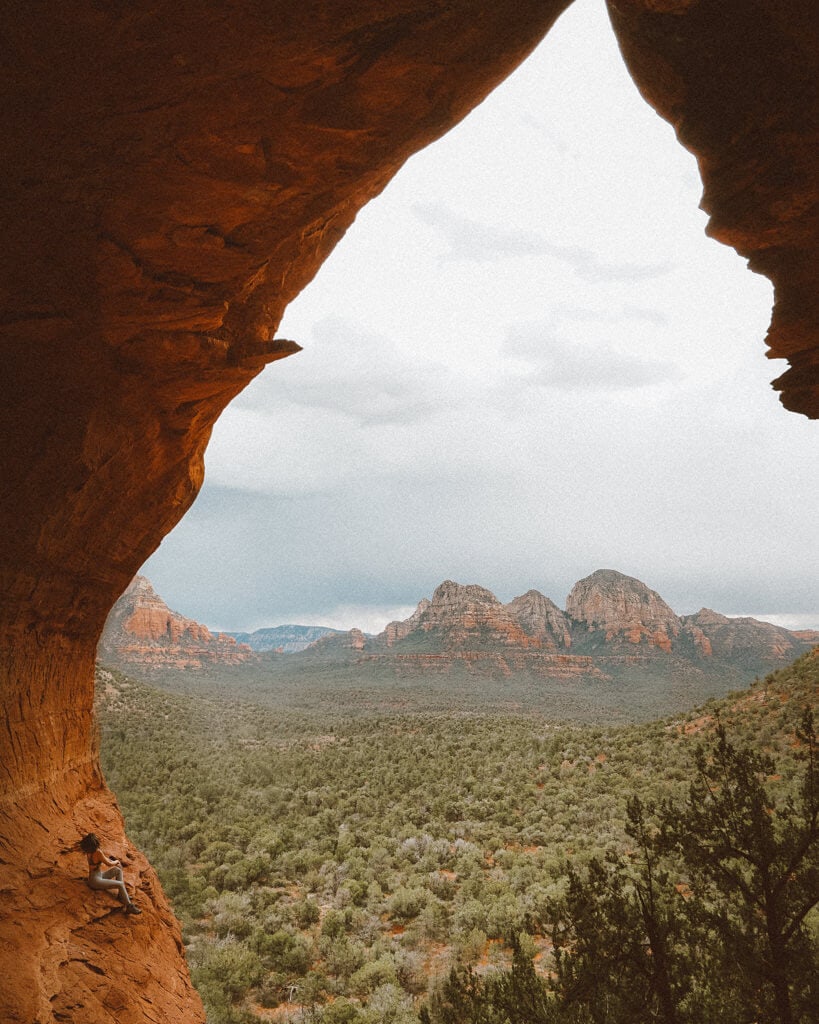
Once inside the cave, you’ll immediately notice how massive it is. Unfortunately, you probably won’t be able to get a good look at the teardrop shape until you make your way to the back of the cave!
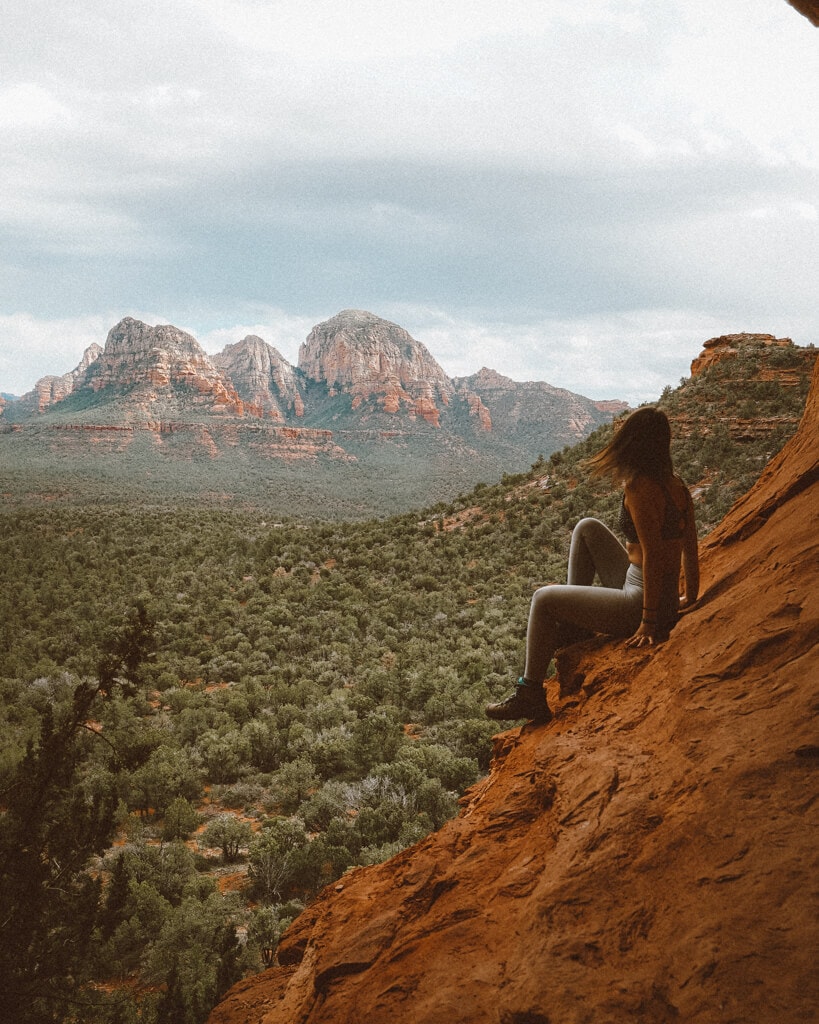
The cave walls are slick, so be careful when climbing around, especially if you’re trying to take pictures!
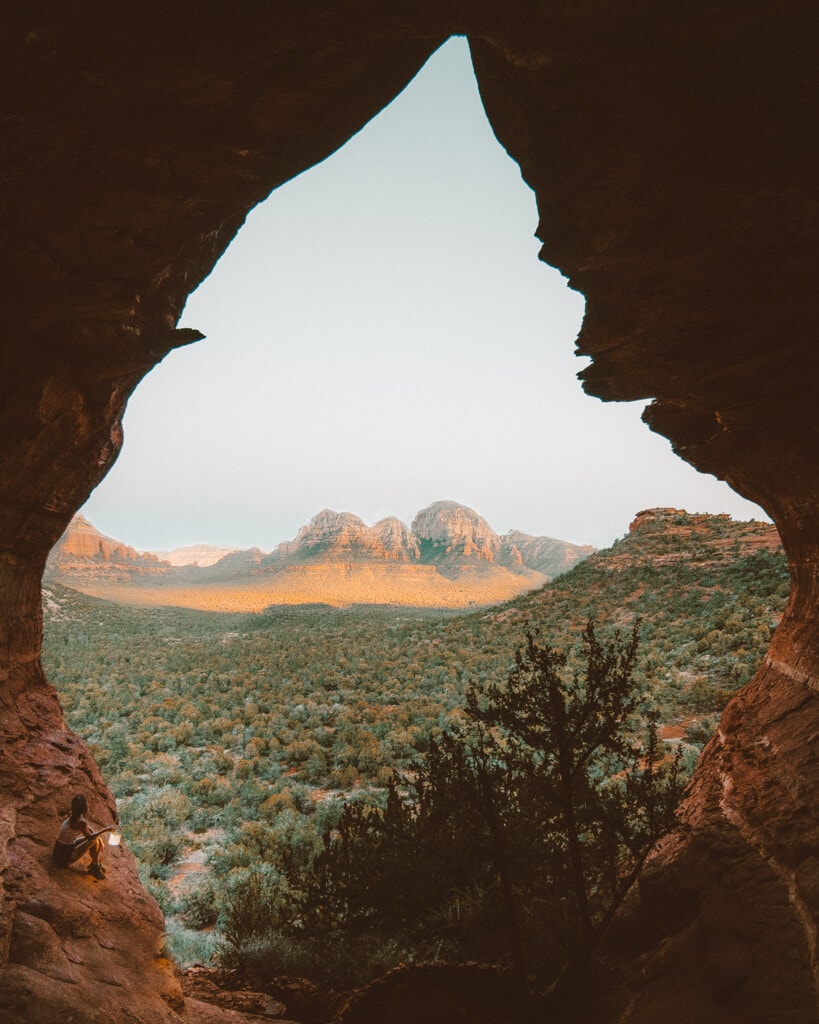
You’ll notice a human-sized hole in the very back and center of the Birthing Cave Sedona. This is where some folks position themselves to take pictures!
Again, careful climbing into the hole because the cave walls are slick. The hole, or belly button as I like to call it, is a great spot to watch sunrise too.
Where to Take the Best Pics
To get the best photos of the Birthing Cave, you’ll want to have a 16-35mm lens. But, of course, that’ll be even better if you have an ultra-wide lens!
Even with my 16-35, though, I still found myself using editing apps to stitch multiple pictures together.
To capture the Birthing Cave’s teardrop shape, you’ll want to climb into the belly button, as I had previously mentioned. You might find it difficult to shoot photos of the cave opening at sunrise because the sun will be super bright, BUT if you can manage to adjust your settings, you shouldn’t have to worry about that.
Or, you can skip the photos and just enjoy the sunrise :).
A commonly asked question people have is whether or not there is somewhere to place a tripod. The simple answer is not really.
The only place in the Birthing Cave you might be able to put a tripod would be our favorite belly button hole. You’ll want to be super careful with making sure your camera is level and support.
If your camera tumbles out of the hole, it’ll surely come crashing into a gazillion pieces. No bueno.
Aside from the belly button, taking pictures along the walls adds a fun perspective! If you want to see what camera gear I use, check out my what’s in my camera bag blog!
Tips for Hiking the Birthing Cave Sedona
To have the best trip to the Birthing cave, you’ll want to keep these tips in mind!
Wear Hiking Shoes with Good Grip
The cave is slick! This is not the place for flip-flops. Instead, wear some hiking shoes with an excellent grip to allow you to move around with ease.
Go Early or Late
Yes, you can undoubtedly hike to the Birthing Cave mid-day, but if you want to get parking, try to go early for sunrise or late afternoon. Also, remember that a hike like the Cathedral Rock vortex might better suit a sunset mission.
Watch the Weather
I’ve mentioned other Sedona sunrise and sunset hikes, but you need to watch the weather for on-coming storms and cloud coverage! When thick layers of clouds reach Sedona, they engulf the entire city entirely, making the red rocks appear washed out and lacking in detail. In my opinion, it makes for “meh” photos.
Be Respectful
The Birthing Cave got its name from its overall shape and a sacred tradition that the Hopi people have—taking women there when it was time to give birth. Over time, the Birthing Cave’s so-called holy abilities haven’t become less valuable to people.
Some women still come to the cave hoping that it will bless them with a healthy pregnancy. Regardless of what YOU think about the cave’s powers, everyone, including you, has a right to visit and enjoy it—regardless of beliefs. When you visit, be respectful of others who visit and their intended purpose for doing so.
Packing List
Luckily, packing for hiking to the Birthing Cave is pretty straightforward! Here’s a quick list of what you’ll need:
✨ Sturdy hiking boots, a cute sun hat, a headlamp, sunscreen, a reusable water bottle, and sunglasses.
Continue the Sedona Fun
The Birthing Cave is a small piece of the magic waiting for you in Sedona. Next up, you’ll probably want to read my 3 days in Sedona guide to see where a hike like this would fit into your trip. Finally, here are some more Sedona blogs you can refer to:
- Sedona Travel Guide
- Most Instagrammable Places in Sedona
- Best Sedona Sunset and Sunrise Hikes
- Best Sedona Vacation Rentals
- Cathedral Rock Vortex
- Hiking Devil’s Bridge
- Red Rock Crossing Vortex
Happy exploring :)!
